Showing posts with label cake. Show all posts

Sunday, November 15, 2009

The End of Cake

タダイマカエリマシタ!!!>w< I'm back!

Grr, Google Ads, cut it out! This is not a cake blog! I know there have been some cake-related things in the past few months, but no! This is a blog about toys and sewing and paper and string and Japan!

See? A soft toy pattern! It's a plushie! ...of a cake. -_-;


This is the last cake-themed thing I'll post for a while. I promise. Really. 
Click to download the pattern as a PDF; instructions and pictures below.

I made this thing on the fly as a present for a former co-worker, the lovely Diana G., who knows everything there is to know about cake decorating and Wilton stuff. I wish I had some pictures of all the cakes she made and demo-decorated on Saturdays, 'cause damn, girl, were they ever awesome. And freaking sweet, too. Like the kind of sweet where you can feel the sugar crystallizing in your veins, but you still want more because it's just SOOOO good.

...eh-hem. ^^;

This is a pretty easy softie in theory; getting the edges of the frosting pieces to lay as you want and stitching them down with blanket stitch is a little bit of a challenge. Just go slow and it'll be fine. It helps if you make the whole cake form first, stuffing and all, and then sew the top frosting layer on to the finished form, so you're not fighting to get it pinned down on a limp, unstuffed model.

A Pictorial Walkthrough

1. Here are your pieces:


2. With a complementary color of perle cotton or embroidery floss, blanket stitch the frosting band to one of the layer side bands. (It helps to baste the pieces together first to keep them lined up while you stitch.)


blanket stitch, close up

3. This is what it should look like. Blanket stitch is a very easy and clean stitch that covers the raw edge of the felt and maintains that little bit of depth between the two pieces. If you have never done blanket stitch before, here's a lovely tutorial that shows it step-by-step. 


top layer, frosted bottom layer

4. Using regular thread, sew the other cake layer band to the top of the "frosted" one you just finished. 


"layer sammich", with finished seam along the top

NOTE: From here on, take care to remember which end is up, else things might get sewn to the wrong side of other things, which is a sucky mistake to make. :(

5. Sew your completed cake sides into a broad loop, wrong side (with all your seams) facing out.


...like this.

6. Sew on the bottom layer of the cake. It's really not hard to sew a circle onto the end of a tube; just line up the edge of the circle with the edge of the tube/cylinder of fabric, take a few stitches where the two are aligned, then turn the circle a bit and repeat. 


This is the top end, actually; notice the frosting on the bottom? I wasn't paying attention. -_-;

7. Sew on the top cake layer just as you did with the bottom, but remember to leave a gap of about 1.5 inches or so (3 cm+) to turn the form right side out. Stuff the finished form and sew the turning gap closed; it doesn't need to be pretty, because the top layer of frosting is going to hide it anyway.

Okay, so wait a second. Why did we just sew a top layer onto the cake if we're going to cover it up with the round frosting piece? Because it makes this last step much easier.


a blanket stitch in progress; going around the top frosting layer

8. Lay your frosting piece atop your finished, stuffed, stitched-closed cake form. Make sure it's centered. (Also, make sure it's on the right end.) Either pin on baste the piece into place so it doesn't get off-kilter while you're going around with the blanket stitch. Using the same embroidery cotton from before, blanket stitch all around the edge of the frosting top layer, laying each "ruffle" of frosting down over the edge of the cake as you go. Navigating the hills and valleys isn't really that hard if you just remember to keep your stitches evenly spaced and parallel to the closest tangent point of the edge.

For the strawberry on top, just make a tiny version of this softie. :D

Thanks for all the cake, Diana! (Especially for making the lemon ones, and letting me eat the extra frosting!) X3

楽しみして、ナハン〜!

Saturday, September 12, 2009

Kitchen Status: Fully Operational

There's nothing like moving across the country to turn up stuff you didn't even know you had.

Like a bundt pan. o_o' And when life unpacks you a bundt pan, there is but one thing to do.

Almond Bundt Cake
with almond drizzle icing and toasted almonds


Original recipes from Allrecipes.com: Glazed Almond Bundt Cake and Vanilla Glaze;
altered and recombined from suggestions on the site and the availability of stuff in my kitchen.

Cake Ingredients:
2.5 cups all-purpose flour
2 teaspoons baking powder
0.5 teaspoon salt
0.5 cup raw, ground almonds*
1 cup of butter, softened
2 cups of white sugar
4 eggs
2 teaspoons almond extract
1.5 teaspoons vanilla extract
1 cup milk
*can sometimes be found ground in the store, but the best way to get ground almonds is to take slivered or sliced almonds and put them in a food processor for about 30 seconds, just until they're in tiny bits. If you're using whole almonds, add a little granulated sugar to the processor to help keep the almond oil from binding your grinds into a paste.

Cake Instructions:
  1. Preheat oven to 350 degrees F (175 degrees C). Generously grease and flour a 10 (12) inch Bundt pan. If you skimp on the pan greasing+flouring, you will have a hell of a time getting your finished cake out of the pan. Seriously.
  2. Mix together the flour, baking powder, salt and ground almonds. Set aside.
  3. In a large bowl, cream together the butter and 2 cups sugar until light and fluffy. If using an electric mixer, use medium speed to introduce ingredients to each other, then high to cream them together. Beat in the eggs two at a time at low speed, then stir in the almond extract and vanilla.
  4. Adding your dry ingredients to the wet, alternately beat in (at low speed) the flour mixture and 1 cup milk, mixing just until you have a homogeneous batter. Pour batter into prepared pan.
  5. Bake in the preheated oven for 45 to 50 minutes, or until a stick of dry spaghetti inserted into the center of the width of the cake comes out clean. Cool cake in pan for 10 minutes, then turn it over and ease it out of the pan onto a wire rack. Allow cake to cool completely before icing.
Almond Icing:

1.5 cups confectioners' sugar
2.5 tablespoons milk
1/8 teaspoon salt (aka "two pinches")
0.25 teaspoon almond extract
1 teaspoon melted butter

Put the dry ingredients in a bowl, then add the wet ingredients and stir until you have a creamy consistency. Easy. Drizzle the icing over your cooled cake.

The only thing left to do is sprinkle some toasted almond slices on there. To toast them fresh (always better than buying toasted almond bits from the store), just spread about a half cup of raw sliced almonds on a baking pan and pop them into the oven at 350 for about 5 to 7 minutes. You can do this while preheating the oven for the cake. :D

This cake kept pretty well in just a tupperware box, actually, and was eaten (with family, although I COULD have finished it off all by myself) over the course of 5 days. Almondy goodness for breakfast. >w<

楽しみして!

Thursday, September 10, 2009

Son of Ramen Cake: Sushi Cake

Please note this post has been delayed by several months because of the move this summer. Sorry. -_-;

My sister's birthday is the season of weird cakes. Last year, it was a bowl of ramen. This year, we tried a piece of sushi.

私の妹の誕生日は毎年面白いケーキを作ってみる。。。が、「面白い」って、実はとても変です。享年のテーマはラーメンでした。今年はお寿司でした。マジですよ。寿司見たいケーキを作ってみました。


お寿司ケーキ...かな...?

The result was... eh, lacking something in the department of realism. However, I remain convinced that the concept and design are solid enough that this cake could be, in the hands of an experienced sugarcrafter, a really slick show.

Coincidentally, I imagine many of you fall into the "experienced sugarcrafter" category. *hint hint*

Here's the original process developed in this first, experimental instance of... Sushi Cake.

STEP ZERO
Make some round cakes and stack 'em up. Three 8-inch rounds were used here, the domed tops of each cut off (to level the cake, but you probably already knew that), and a layer of frosting spread between the layers (to make the layers stick together, but I'm pretty sure you knew about that too). Flavor is entirely arbitrary; per my sister's desires, I used strawberry and chocolate cake mix, marbled together.


STEP ONE

Spread white or off-white frosting all over the top the cake. Again, flavor is arbitrary, constrained only by the fact that it needs to be of a whitish color. We used cream cheese frosting (again, sister's choice) from a can. And not the "whipped" kind, because I hate it.

STEP TWO
Now you need sprinkles. Lots of Sprinkles. Sprinkles that look like rice, or as close to rice as you can possibly find them. I believe they call this shape of sprinkle "jimmies", or at least that's what they were labeled when I finally found them in Missouri. Incredibly, I could not actually find plain white jimmies, but the local Hobby Lobby was able to come up with these cool pearlized off-white ones for me, which actually look even more like cooked rice than I was originally hoping for.


寿司ご飯のように :D

Sprinkle the sprinkles (hurray for immediate noun-verb congruity in a sentence!), all around the top of the cake, leaving a round area in the middle of the cake with only frosting. This will be the "core" of the sushi, where the key ingredients would be rolled up if the sushi were real. You might want to make an indentation in the frosting to mark out this part. The wide ring of sprinkles, meanwhile, is the thick layer of rice. It looks more rice-like as you get a heavier coating of sprinkles on there... try to completely hide the underlying frosting.

STEP THREE
Now we need a substitute for the seaweed wrap (焼き海苔:やきのり: yakinori, literally "cooked seaweed") that goes around a roll of sushi. You could, of course, actually use yakinori... or you could find/make the darkest, blue-green-brown frosting that you possibly can. If you know how to make frosting and have access to powerful sugary secrets, you can probably do this very well. In my case, I had a can of lemon frosting (yes, sister wanted lemon), and several vials of food coloring. This is the lemon frosting after about two little bottles of blue, two of green, a few drops of yellow and a hit of red:


やきのり色(か?)アイシング

...not very nori-colored, but the base frosting was starting to get watered down with all the food coloring, so... meh. Spread your seaweed-colored frosting all around the sides of the cake, keeping the surface smooth and even so it looks at least a little like a wrap around sushi, and not like bizarre green frosting on a cake.


Your cake should now look something like this. Actually, your cake should look
better than this.


STEP FOUR
Now you add the core of the roll; that is, you put things that look like a sushi core in that bare spot in the middle of the cake. Sushi allows for almost anything to be rolled up at its core, usually in sets of three to five ingredients. Because not all of these ingredients are easily imitable in a sweet format, I tried to mimic three of the more common ones:

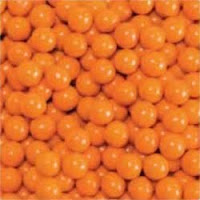
オレンジ色チョコ飴、orange Sixlets = いくら、ikura, salmon roe (fish eggs)


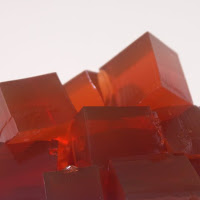
赤ゼラチン、 cherry Jello (super thick "Jigglers" recipe) = まぐろ、maguro, raw tuna


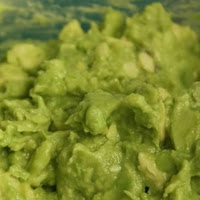
ピスタチオプディング、 pistachio pudding = アボカド、 avocado


出来上がり...さああ。ケーキの味はいちごとチョコ、アイシングの味はクリームチーズとレモン。そして、実は、おいしかったよ。o_o' 本当に。

OKAY, so here's our chocolate+strawberry cake with cream cheese+lemon frostings,* topped with pudding, jello, and little chocolate candies, that is intended to look like a roll of sushi. In retrospect, I think my ratio of width-of-rice-band to sushi core was pretty off. A real roll of sushi has a thinner rice band and a wider core. Also, the pistachio pudding was way off the color of real avocado, and the wrong consistency. I think if I'd used a chunk of mint fudge or something, it'd have lent the right kind of shape and color to the whole thing.

Then again, there would likely have been a fight over who got the lump of fudge. -_-;

*And, would you believe, it actually tasted awesome. o_o'

Friday, June 13, 2008

Food Imitating Food

My sister wanted a nifty cake for her birthday this year. In the past, we'd made a scratch version of the famous Katamari Damacy cake, but I wasn't willing to go through that kind of madness again, so we settled on a design that would be easier to bake. Or so we thought.

Behold, the terror that is.... Ramen Cake.


In retrospect, this was a bad idea. The bulk of the cake was too thick to bake properly in our pan of choice (actually a steel mixing bowl), so we tried doing it in two parts by sinking a smaller metal bowl into the cake, then baking a smaller cake in that bowl later to plug the hole in the larger cake. Didn't work, though. Somewhere along the line of baking, observing, repositioning, and "emergency improvisations," there were roughly equivalent amounts of unbaked cake in and out of the oven. Three rocks and one ceramic shishi figurine also became covered in half-cooked cake batter in a series of events that I refuse to relate to the public. Suffice it to say, baking this bastard was hell.

Frosting wasn't much fun either. If you're going to make an artsy cake that depends largely on the stiffness of your icing, for god's sake, don't use store-bought "fluffy" whipped can frosting. We had to move the cake and it's decoratives in and out of the freezer in carefully orchestrated shifts to avoid a meltdown.

In any case, we ended up with a cake that looked vaguely like a bowl of ramen. I think if we'd put it in a real bowl, it might have been pretty believable. The noodles came out right, and the kamaboko (fish cakes), while, oversized, are pretty close. Kid had her party, teenage appetites abounded, and the saga of Ramen Cake came to a sticky end.

As for my birthday, taiyaki will do nicely. As long as I don't have to make them.