Showing posts with label tutorial. Show all posts

Tuesday, 18 March 2014

Playing with tyvek

Since I saw those videos on YouTube, I wanted to play with tyvek:

Odkad obejrzalam te dwa filmiki na YT, chcialam wyprobowac tyvek:


I started to search for tyvek in German patchwork shops and what I found were few different types of tyvek: so called fabric-tyvek in different weights and paper tyvek (white and silver; now, white one is not available anymore). As there were no good photos of fabric tyvek and it was cheaper, I got two kinds of it - thicker and thinner, just to try.
How dissapointed I was when the package arrived. The tyvek didn't look at all like the one on the YT videos. It was looking more like a soft, perforated vinyl tablecloth:

Zaczelam wiec poszukiwania tyveku w niemieckich sklepach patchworkowych. Znalazlam kilka rodzajow - 'materialowy' tyvek o roznej grubosci oraz bialy i srebrny 'papierowy' tyvek (bialy nie byl juz dostepny w momencie, gdy chcialam go kupic). Jako, ze 'materialowy' byl tanszy (a nie bylo prawdziwego zdjecia, zebym mogla go zobaczyc), postanowilam sprawdzic co to jest, z nadzieja, ze to wlasnie to, czego szukam. Jak wielkie bylo moje rozczarowanie gdy paczka przyszla to wiem ja i Marzenna (@ patchworkowo-kiboko.blogspot.com, bo dla niej tez kupowalam). Tyvek w ogole nie przypominal tego, ktory byl pokazywany na filmikach na YT. Wygladal jak dziurkowany wodoodporny obrus:
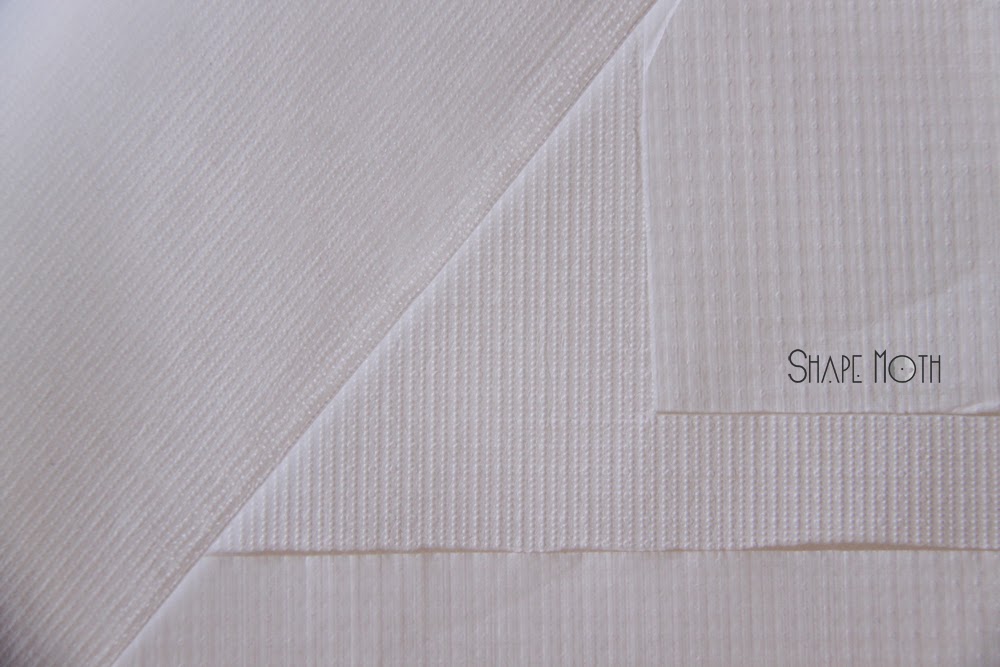

It also didn't behave like the one on the videos after heating it. It didn't want to burn through nicely and when I tried, I got something reselmbling burned plastic instead of bubbles and holes. And the thinner version was even worse than the thicker one.
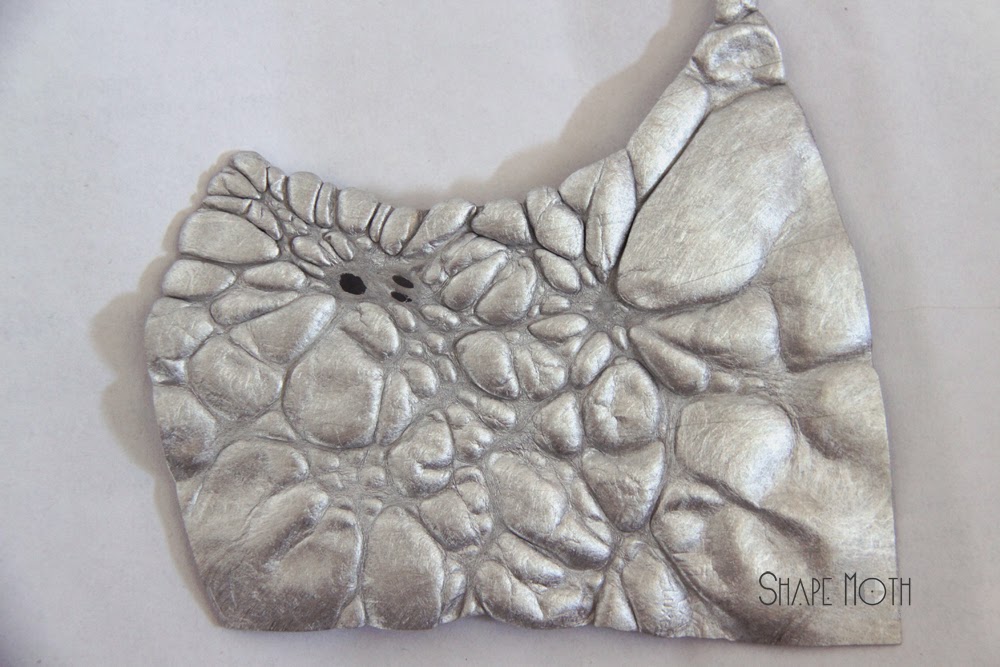
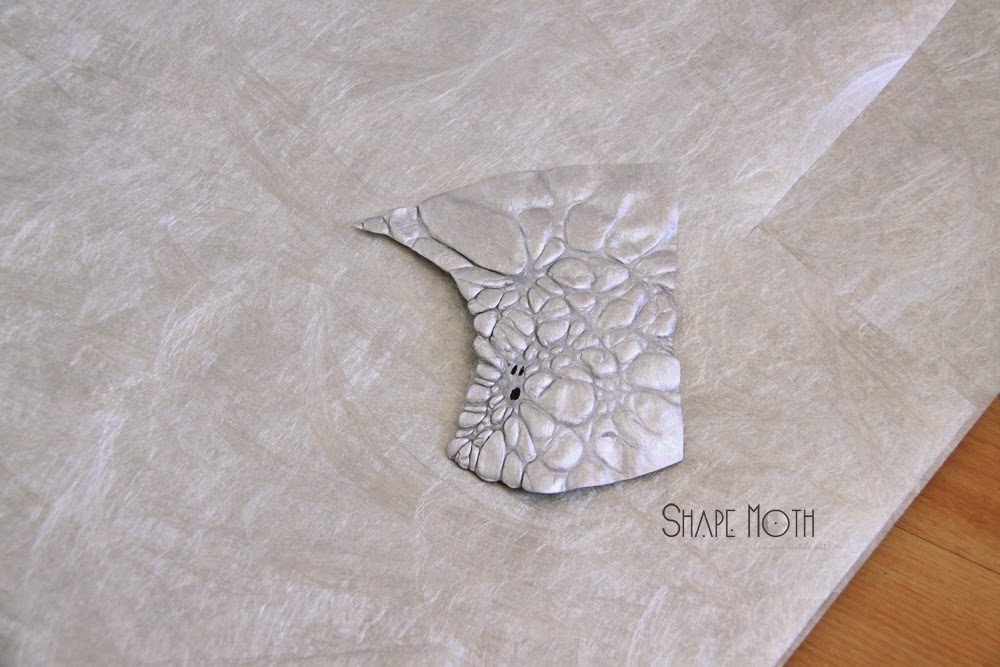
After few tries, I decided to give the paper tyvek in silver a go (as the white was not available anymore). I should do it from the very beginning, as that was the right choice :) It's something between the paper and aluminum foil. The bubbles are created easily and it also burns through in between:

No wiec obrusowi bylo daleko do moich oczekiwac. Pierwsze kilka prob z pogrzewaniem zelazkiem skonczylo sie niemalze na wywaleniu zelazka przez okno... Raz udalo mi sie uzyskac babelki ale struktura tego materialu byla nie do przyjecia. Te dziurki wygladaja ochydnie. Przestrzen miedzy dziurkami nie chciala sie tez przepalac, tylko topil sie ten material na podobe plastiku. Kasa poszla w tzw. bloto... 
Nic to, czlowiek uczy sie n bledach. Zamowilam 'papierowy' tyvek w kolorze srebrnym (bialego juz nie bylo). I tak trzeba bylo zrobic od razu, bo to wlasnie to, co trzeba. W dotyku to cos jak kartka papieru polaczona z folia aluminiowa. Babelki tworza sie bez problemu, pomiedzy sie przepala, no cud, miod i orzeszki:

And why tyvek at all? For few elements for the next quilt. I needed to make a bird's skull (vulture's skull, to be precise). I wanted it to be different from the rest of the quilt top. To have a different structure and look very old, destroyed and sun-bleached. I just thought, that tyvek would be great for this purpose. 

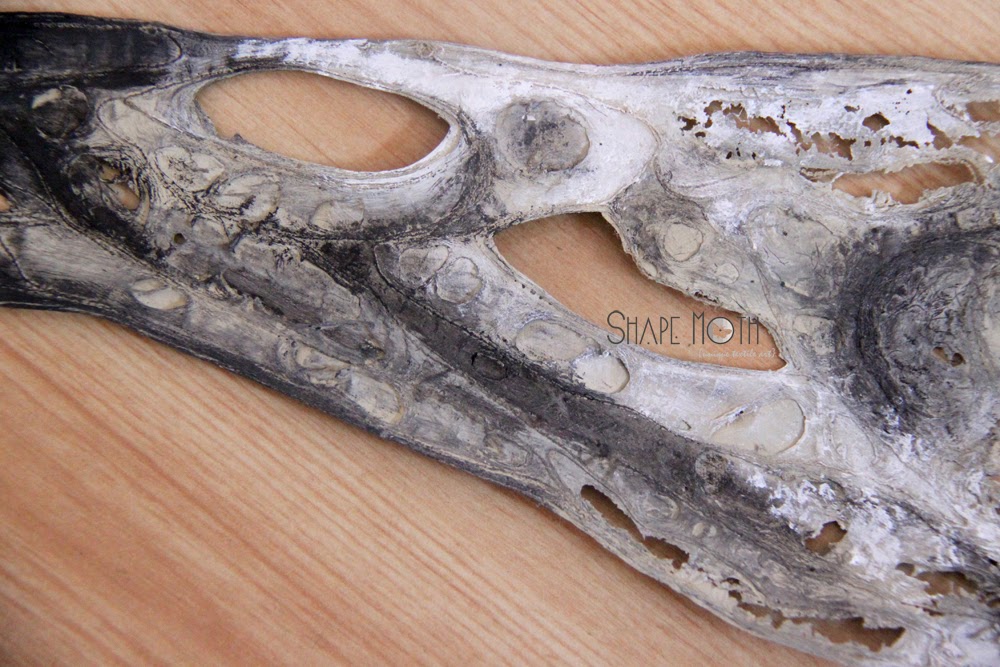
What I did was to sew two layers of tyvek onto a piece of stabiliser and free-motion-quilted the outlines of the skull (unfortunatelly no photos from this stage). Then I cut some holes in tyvek and the rest of the job did the iron (I did burn too much in some places, but it's difficult to perfectly control the process). After heating tyvek, I painted the skull with acrylic paints:

A czemu w ogole naszlo mnie na tyvek? Potrzebna mi czaszka sepa do nastepnego quiltu. Chcialam, zeby wyrozniala sie od reszty quiltu. Zeby miala inna strukture. Takiej zniszczonej, przepalonej przez slonce kosci. Gdy zobaczylam filmiki na YT, jakos tak od razu przyszlo mi na mysl, ze tyvek by sie tu idealnie nadawal.
Naszylam dwie warstwy tyveku na stabilizator do haftu, przeszylam kontury czaszki (stopka do pikowania), wycielam wieksze dziury w tyveku, a reszte przepalilam zelazkiem. Nie jest idealnie, bo w niektorych miejscach sie troche za bardzo przepalilo, ale to akurat dosc ciezko kontrolowac w 100%. Calosc po ostygnieciu pomalowalam farbami akrylowymi (tu uklony w strone mojego TZta, ktory ma cala palete kolorow do figurek Warhammer'a, w kolorach np. 'bleached bone' czy 'skull white' ;)
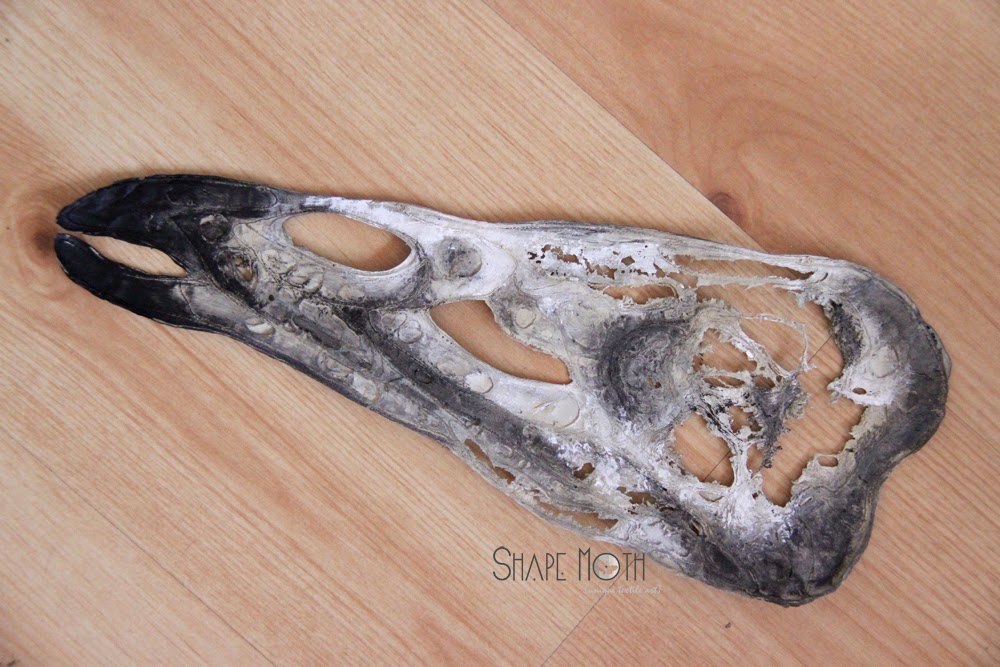

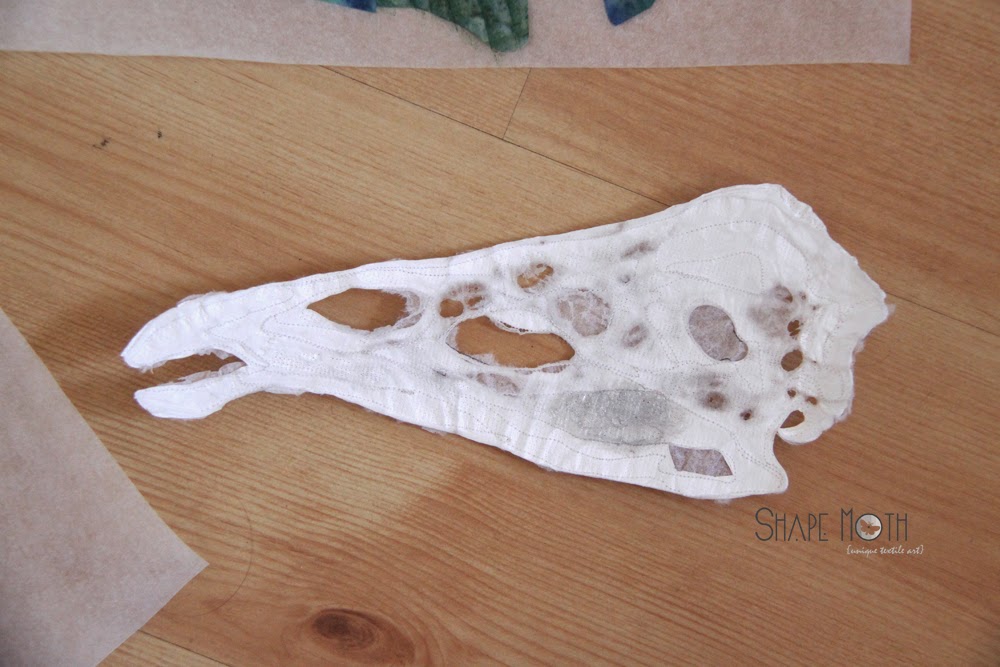
I also tries the same with the other tyvek (the perforated white one). Just as a sort of experiment. The results were far from the ones I expected. I got kinda sad dinoraus skull:

Zeby nie bylo, z 'obrusowym' tyvekiem tez sprobowalam. Niestety, zamiast sepa, wyszlo mi cos na podobe czaszki bardzo smutnego i chudego dinozaura...

And just for comparison:

A to dla porownania:
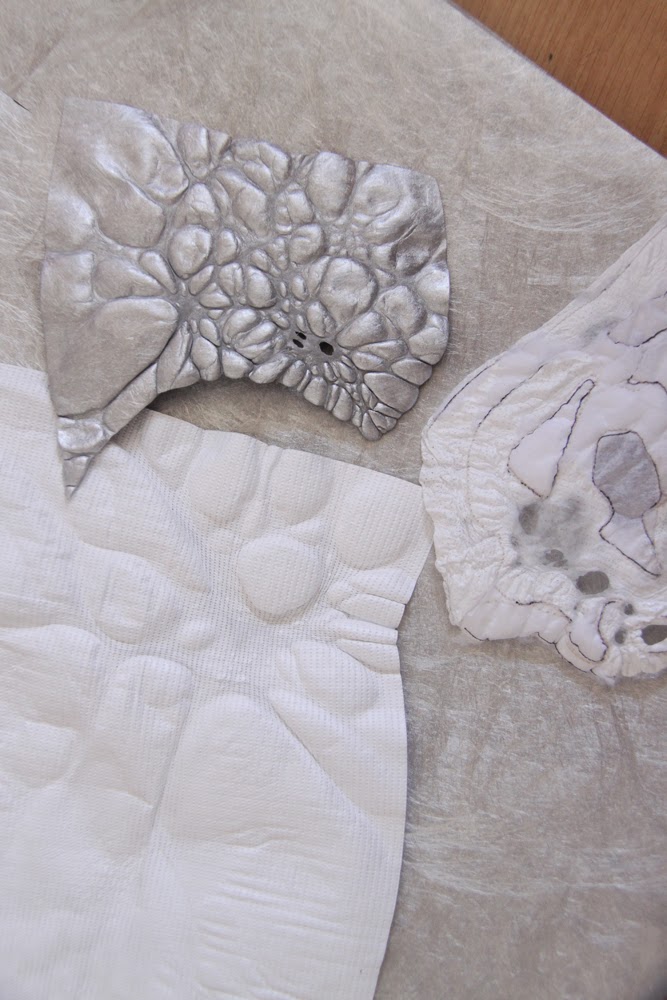

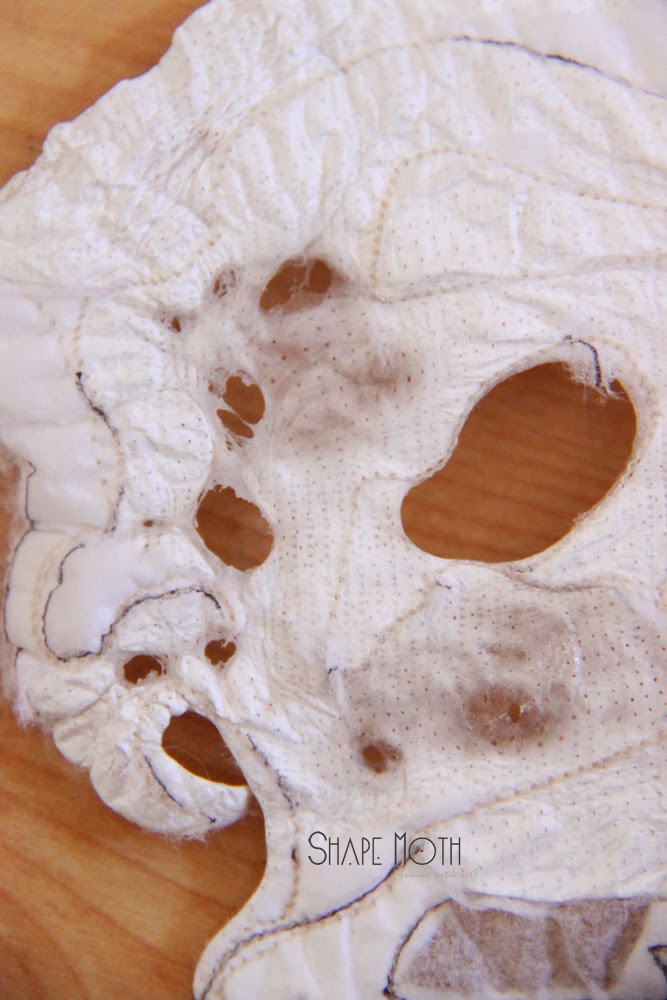
It's easy to see on this one, how this 'fabric' tyvek doesn't want to burn through, but instead it looks like melted plastic:

Tu dobrze widac, jak sie 'materialowy' tyvek topi (robi sie taki mleczny, przezroczysty i strasznie twardy), zamiast przepalac:

But I encourage you to try tyvek some day. It's fun and gives tons of possibilities!

Zachecam do zabawy z tyvekiem. Naprawde. Mozliwosci jest cala masa, a do tego jaka radosc jak cos fajnego wyjdzie :)

Monday, 8 April 2013

Eurasian Jay {Forest QAL}

I haven't shown much except Forest QAL blocks lately, but that will change soon, I promise. Last 2 weeks I wasn't sewing almost at all (Easter, driving to Poland, visiting family) and now, slowly, I'm starting sewing again. I have few WIPs to finish.

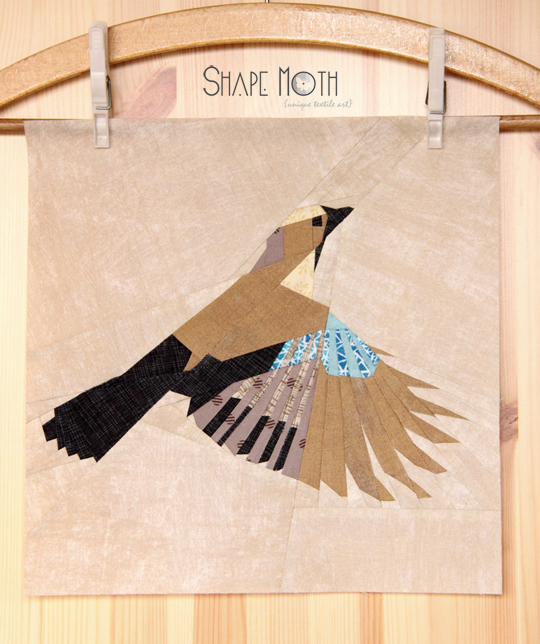
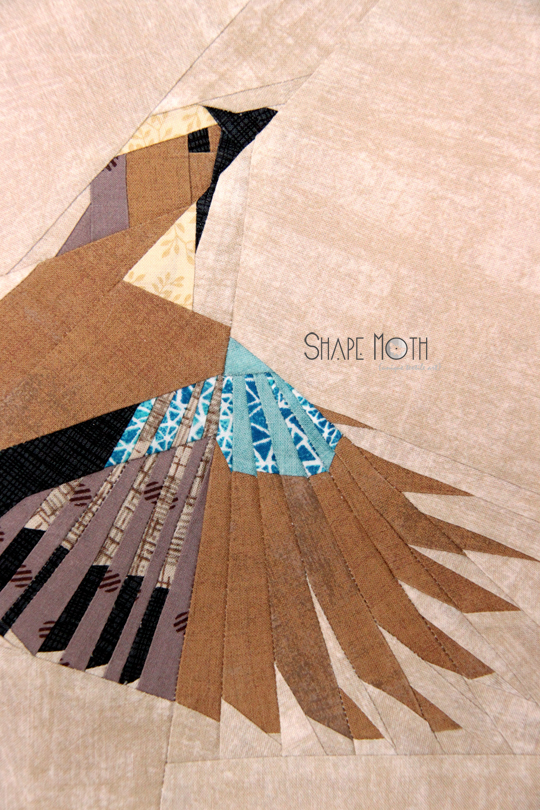
Today I'm sharing next Forest QAL block - Eurasian Jay. I have to admit that this block is very difficult and tricky to sew (for a 12" x 12" block; it would be much easier if it would be bigger) and I spent quite a time sewing all those little pieces together (still, some points do not meet, but it has to stay as it is at this point).

Niewiele sie szylo przez ostatnie prawie 3 tygodnie. Troche siedzialam przy komputerze i poprawialam stare wzory PP, a teraz czas najwyzszy odkurzyc maszyne i wziac sie do roboty ;) 
Dzis kolejny blok w Forest QALu - nasza europejska sojka. Blok (przyznam bez bicia) bardzo trudny. Gdyby byl w wiekszej wersji (niz 12 cali x 12 cali) to byloby znacznie latwiej bo i czesci do zszywania bylyby wtedy wieksze, a tak trzeba sie potrudzic z malutkimi papierkami i duza iloscia zachodzacych na siebie zapasow na szwy:


Block measures 12" x 12" finished (EDIT: I corrected labelling on the pic): 
Blok ma 30 cm x 30cm:
 
  
*here is the mirrored image of the block (EDIT: I corrected labelling on the pic):
* tu jest lustrzane odbicie bloku: 


*Important!* The templates in pdf are mirrored, so to get the correct direction in the block (jay facing right), you have to sew with printed-side of the paper up and the fabric is on the non-printed side of the paper, with the wrong side of the fabric facing the paper.
*Wazne!* Zeby otrzymac dokladnie taki blok jak pokazalam na pierwszym obrazku (sojka zwrocona w prawa strone), musicie szyc strona zadrukowana do gory, a material ma znajdowac sie pod spodem, lewa strona zwrocony do papieru. Jesli chcecie, mozecie oczywiscie uszyc blok w odbiciu lustrzanym; mysle, ze nie robi to zbyt wielkiej roznicy :)

Here's a blank picture, so you can play a bit with colour choices before sewing:

Tutaj obrazek bez kolorow, zebyscie mogli wyprobowac zestawienia kolorystyczne zanim zaczniecie szyc:


Assembling parts:


That's how my sewing looked like:
A tu kilka etapow z mojego szycia:


Don't forget to show us your block in Forest QAL Flickr group! I hope you will not get discouraged by the difficulty of the block :)

Nie zapomnijcie pokazac swoich blokow w naszej Flickr'owej grupie! Mam nadzieje, ze nie zniechecicie sie trudnoscia bloku i wkrotce pokazecie swoje uszyte sojki :)

Monday, 11 March 2013

Feathers {Forest QAL}

Forest QAL started with beautiful woodpecker block designed by Julianna. I'm really happy and amazed, how many of you decided to join Forest QAL and are sewing wit us. Just have a look at all those beautiful woodpecker blocks in Forest QAL Flickr group. Simply amazing!

I designed block with feathers. I always valued feathers very much. For me they have a special meaning, especially feathers from birds of prey and owls (I was working for a long time with animals, I raised many birds and I was also deeply interested in Native American Culture for few years). Besides, in animal-themed QAL there simply had to be feathers.

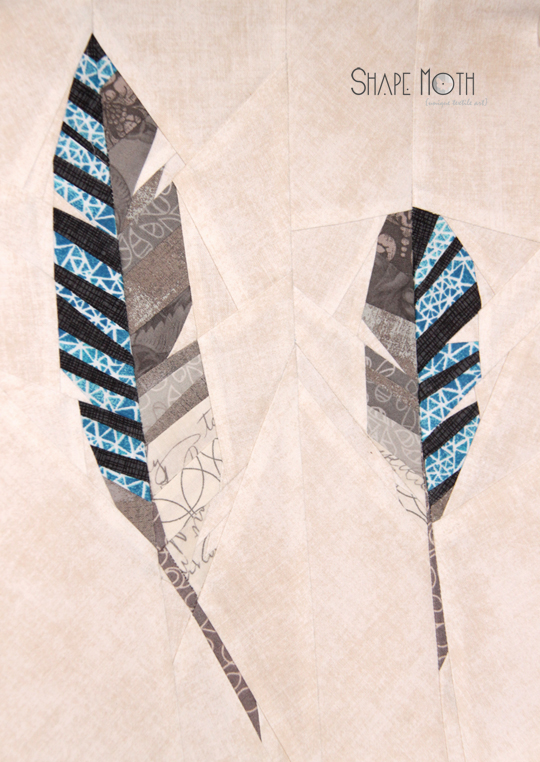
I was already showing 2 block designs in info post about QAL, so you know, that there will also be Eurasian jay block. I decided to sew jay's feathers (I modified slightly the PP pattern which I'm sharing, adding more lines on the black/blue side of both feathers; the pattern in pdf will look exactly like the one in the EQ7 drawing below).

Nasz QAL rozpoczal sie przepieknym blokiem z dzieciolem, zaprojektowanym przez Julianne. Bardzo mnie cieszy, ze tyle osob (w tym z Polski) zdecydowalo sie dolaczyc do Forest QALu i szyc razem z nami. W grupie Forest QAL na Flikrze mozecie zobaczyc wszystkie bloki, ktore do tej pory zostaly uszyte - a jest co ogladac! [Jesli nie macie konta na Flikr a chcecie dodac tam swoje zdjecie, przeslijcie mi je na maila, a ja je dolacze]. 
Moj pierwszy blok w QALu to piora. Mam do nich bardzo specyficzny stosunek i mysle, ze na pewien sposob sa dla mnie magiczne. Zwlaszcza piora ptakow drapieznych i sow. Mysle, ze ma to zwiazek z moim dlugoletnim zainteresowaniem kultura Indian Ameryki Polnocnej i moja praca ze zwierzetami i ich wychowaniem. A poza tym, jakze moze zabraknac pior w tak tematycznym QALu :) 
Jako ze w pierwszym poscie informujacym o QALu pokazalam 2 bloki, wiecie, ze bedzie tez sojka. Zdecydowalam sie na piora sojki, zeby wszystko ladnie pasowalo. Wzor zmienilam troszke na swoje potrzeby. Dodalam wiecej linii po jednej stronie pior, zeby wyszly gesciejsze niebieskie i czarne paski.


The aim was to make them look a bit like those: 


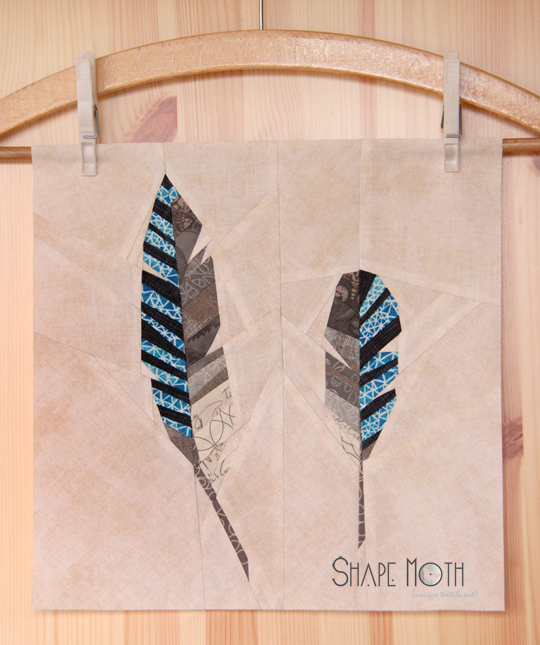
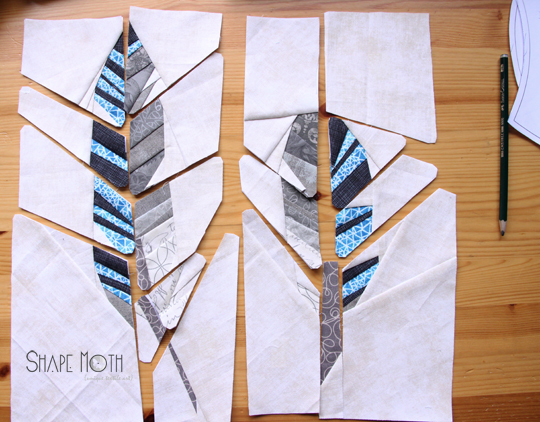
This is how the pdf pattern looks. Block measures 12" x 12" finished: 

Tak wyglada blok z piorami (mierzy 30 cm x 30cm):


* here is the mirrored image of the block:

* tu jest lustrzane odbicie bloku (moze sie przydac przy ukladaniu czesci):


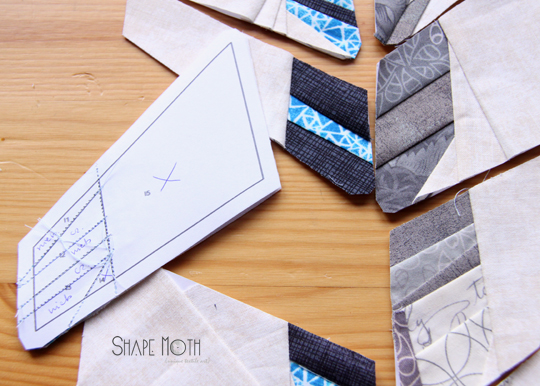
*  Important! * The templates in pdf are mirrored, so to get the correct direction in the block (big feather is on the left), you have to sew with printed-side of the paper up and the fabric is on the non-printed side of the paper, with the wrong side of the fabric facing the paper (see also the second photo below):

* Wazne! * Zeby otrzymac dokladnie taki blok jak pokazalam na pierwszym obrazku (duze pioro po lewej), musicie szyc strona zadrukowana do gory, a material ma znajdowac sie pod spodem, lewa strona zwrocony do papieru (patrz - drugie zdjecie ponizej). Jesli chcecie, mozecie oczywiscie uszyc blok w odbiciu lustrzanym; mysle, ze nie robi to zbyt wielkiej roznicy :)


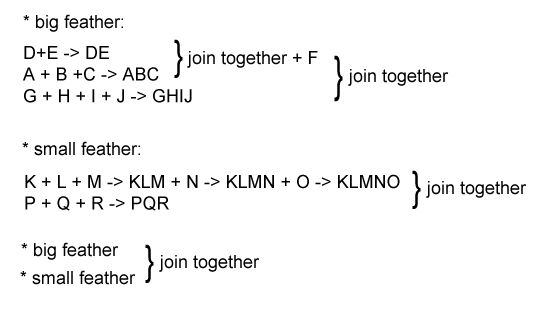
* assembling parts:

* zszywanie czesci:


Don't forget to show us your block in Forest QAL Flickr group! I can't wait to see which colors and fabrics you will choose to make the feathers. Maybe some of you will also try to imitate feathers of a particular bird :)

Nie zapomnijcie pokazac swoich blokow w naszej Flickr'owej grupie! Jestem bardzo ciekawa jakie materialy i kolory wybierzecie do uszycia pior. A moze sprobujecie uszyc piora jakiegos konkretnego ptaka? 

Monday, 8 October 2012

Drawing curves with EQ7 - tutorial

I was planning to write another Electric Quilt 7 tutorial for a long time. This time on drawing curves (very useful feature I have to admit). 
Last time I didn't really finish any new project that I could show you now (I have one EPP finished which I will show on 27th of October, I've made some purses for my shop but don't have photos yet and I had a trial week in a new job :) ), I decided that it's a good time for writing a tutorial :) 

Tak tytulem wstepu tylko. Niewiele szylam przez ostatnie dwa tygodnie. Tzn. szylam, ale niewiele skonczylam. Duzo czasu zajal mi projekt English Paper Piecing (ktory bede mogla pokazac dopiero 27go pazdziernika), uszylam kilka nowych portmonetek do sklepu (ale nie porobilam jeszcze zdjec), mialam tydzien probny w potencjalnej nowej pracy (moze sie uda :) ), no wiec tutek wydawal mi sie najlepszym rozwiazaniem. Bedzie po ang, zeby nie balaganic. Jest duzo print screenow po drodze i mysle, ze nie jest trudny. To kolejny tutek z serii o Electrc Quilt 7, tym razem jak rysowac luki w tym programie. 
I pytanie do was - jest jakis konkretny tutorial, ktory chcielibyscie zobaczyc na moim blogu? Teraz w sieci jest tyle tutkow, ze nie chcialabym pisac o czyms, o czym kilkanascie(dziesiat) osob juz napisalo ;)

** question: is there any special tutorial which you would like to see on my blog? I'm open to anything :) **


First of all, you will need an idea which kind of block you want to sew. You can of course draw the block templates by hand (it's especially easy when you have some special curved rulers), at the end just adding the seam allowance to the pieces. No problem. I was drawing curves like that, before I learned how to do it in EQ7. But it's (i) time consuming, (ii) might be not really so acurate and (iii) did I mention time consuming? I always hated drawing seam allowances around each part; it was taking ages. 

As in my first EQ7 tutorial, in this one I will base my work on an already existing picture. I was drawing 2 different blocks with curved pieces in Photoshop to show you how EQ7 works:


Worktable ->Work on Block 
Block -> Easy Draw Block [1]
Tracing image tab on the bottom left [2] -> Import Image Icon [3]


Names of the buttons on the left sidebar:

The picture is already displayed. 
Choose Easy Draw tab [1].
Be sure to choose 'Snap to lines and arcs of drawing' button as well as 'Snap to nodes of drawing' (this one is especially important if you are drawing multiple arcs in one shape  - more details later) on the top (right) sidebar.

Choose Arc tool [2]:


Left click at the point you want to start drawing curve [1] and drag the line (left mouse button pressed all the time) to the end point [2]. Now you have drawn a curved line, which is anchored to the edges of your block. What you still need is to adjust the shape of the curve to your needs.


Click 'Shape' tool [1] and left click on the curves line which you want to edit. Two dotted lines meeting in one point will show. Left click on that point [2] and - pressing the left mouse button all the time - start to move the point around. You will see how the shape of the arc will change:


If you are happy with the result and the arc matches the shape of the curve on your picture (for those who do not use picture as a template  - you can just play with the curves' shapes as you like), just stop pressing left mouse button. The curve will stay as it is:


When you press Color Tab (bottom of the window) you can see that drawing the curve was succesful: 


Continue with other curves in the same way. For printing the pattern (more details on this topic in the first EQ7 titorial) I choose or 'Foudation pattern' or 'Templates' (if you choose 'Foundation pattern' you have a possibility to print mirrored templates while when selecting 'Templates', the templates will be not mirrored). Of course you cannot foundation (paper) piece curved templates. Such option of printing gives you just chance to get mirrored templates.


But what if you drag at the arc and it just doesn't want to create a line in the shape you like? Method shown above works perfectly for gentle curves.


What works the best for me is drawing multiple arcs to create one shape. How many arcs? You just have to try. Usually 3-5 work for me.
Remember about top right buttons - 'Snap to lines and arcs of drawing' and 'Snap to nodes of drawing.  

Draw the first arc:


Second arc will start where the first one ended, the third where the second ended (and in this case, will anchor te shape to the edge of the block):


Click on 'Color' Tab to see if your drawing worked (sometimes it happens, that some lines do not snap where they should; I click on 'Color' tab several times while I draw; it helps correct mistakes quickly):


Draw all the shapes in the same way. As you can see, for creating one curve I've drawn 3 arcs, for another - 4 arcs.


Hope the tutorial was a bit helpful :) If you have any questions, I will do my best to help you.

Monday, 7 May 2012

Stitch - Block 12 {Sew Out Loud QAL} and acknowledgements

And here we are. The last block in Sew Out Loud QAL, designed by Caroline ~ TrilliumDesign:


The designers of the SOL QAL appreciate all the time and effort involved in designing a block for the contest so we decided to award prizes to each of the four runners up of the SOL QAL contest! We have put together four prize packages of pdf patterns and fabrics that were grouped by theme: Garden, Kitchen, Winter and Nature. They were assigned randomly and are as follows:

cracktpot: Garden prize package

Garden themed pp patterns from During Quiet Time (pick 3)
Butterfly pp pattern from Charise Creates
Fabric pack from Quirky Granola Girl

Lawson and Lotti: Kitchen prize package
Teapot pp pattern from Charise Creates
Tea Kettle pp pattern from During Quiet Time
Kitchen Set (4 pp patterns) from Sew Ichigo
fabric pack from Jednoiglec

beckysblabber: Winter prize package
Vintage Skier pp pattern from During Quiet Time
Ski Chalet pp pattern from Charise Creates
Winter Woolies and Candy Cane Love pp patterns from Verykerryberry
Text prints from lolablueocean
 
tinkerfrog: Nature prize package
squirrel, cat, cameleon, deer and 3 different foxes pp patterns from Me (pick 3)
dachshund pattern from Badskirt
leaf Key fob pattern from Leila Where Orchids Grow
 
Thank you all for joining SOL QAL, for lots of fun during those weeks together and my special thanks go to all designers for the amount of work they put in creating all the amazing blocks, for their creativity and friendship!

Saturday, 28 April 2012

Free Small Dahlia block templates

Thank you all for voting for my quilt in HST Festival organised by Canoe Ridge Creations. I won the grand prize!

I was overwhelmed by all your comments (both here and on Flickr) about my 'Windswept Blossom' quilt top. Thank you so much! Many of also asked how I did sew the dahlia in the middle. 

Dziekuje za wszelkie glosy w konkursie oddane na moj quilt. Udalo sie! Zajelam 1sze miejsce! Bardzo goraco dziekuje za wszelkie komentarze na temat quiltu. Bardzo sie ciesze, ze sie wam podoba. Wiele osob pytalo mnie, jak uszylam kwiat w srodku.


So I prepared a pattern with the templates for you. Unfortunately, I cannot guide you through the whole process, as I don't plan to sew another dahlia at the moment, and when I was actually sewing, I didn't make any photos. This is the pattern from EQ7. I coloured the dahlia in a way that you get a fresh and a bit transparent look. Traditionally, as all the little pieces have curved edges, all the tiny elements are cut separately:

Wiec przygotowalam dla was wzor dalii. Nie mam niestety zdjec z procesu szycia (zawsze zapominam o aparacie podczas szycia, a jak go nie mam pod reka, to i nie robie zdjec). Wzor to mala dalia, kolory dobralam w programie Electric Quilt 7. Tradycyjnie, kazdy maly element jest wycinany oddzielnie, bo kazdy maly kawalek dalii ma zakrzywione krawedzie:


I did it a bit differently. I divided the flower into parts, like those below. The long sides remain curved, but the short perpendicular lines are straight (you can clearly see it on the template, those pieces below are copied from the main design from EQ7, so they are still curvy). As you can see, the dahlia is built from 16 such parts, plus the small dresdens in the middle. 

Ja uszylam ja troche inaczej. Podzielilam kwiat na czesci (takie jak widac na obrazku ponizej). Dlugie krawedzie nadal sa zakrzywione, ale krotkie prostopadle linie sa proste (widac to w pliku pdf ze wzorem, te czesci na dole sa skopiowane z gornego obrazka). Jak sie dobrze przyjzycie, dalia jest zbudowana z 16 takich kawalkow i malych dresden plates w srodku.


First, you have to choose your colourway (you can also change the appearance of the dahlia by changing the overall position of the coloured fabrics). If you want to do it like I did it, you need to print the templates: 16 flower pieces (the fabric pieces have to be paper pieced on them), 16 little dresden blades (for them I used english paper piecing, it's much easier for hand sewing) and 1 surrounding piece (it goes around the circle), which you need to copy on fabric 4 times

You can see, that the position of the colours on dahlia is repeating itself. For the main body of the block you will need 2x8 pieces in the colourway shown on the picture below:

Jesli chcecie uszyc dalie w takich kolorach jak ja, musicie wydrukowac 16  czesci kwiatu (materialy sa do nich doszyte metoda paper piecing'u), 16 dresden plates (ja zszywalam je recznie metoda zwana english paper piecing, tak jak sie zszywa hexagony, z papierkiem w srodku; wybralam 2 kolory materialu na dresden plates, wiec z kazdego wycielam po 8 kawalkow) i kawalek, ktory otacza kolo (trzeba go odrysowac 4x na materiale). 
Przygotowujecie metoda PP po 8 kawalkow takich jak pokazano ponizej (ten uklad kolorow da wam taki efekt jak w moim quilcie):


You just paper piece them and then trim along the curved edges. After removing the paper the tricky part starts. You have to sew curves, alternating the pieces. Once the darker one, then the one with more white. And so on, and so on, untill you finish the whole circle. Then the dresdens in the middle. I had sewn them by hand, as it was much easier. I also did not join them in the middle, but cut the ends and hand sew the circle at the center part. That's also much easier then joining ends of 16 little dresden blades together. The last part is the surrounding fabric which squares your dahlia block. I first sew all the 4 pieces together and then sew the circle in (I was posting some links to sewing circles HERE).

Po uszyciu PP wszystkich 16 kawalkow, trzeba je zszyc razem. Szycie po luku nie jest latwe i jesli jeszcze go nie probowaliscie, polecalabym pocwiczyc na niechcianych kawalkach materialu. Kawalki zszywamy naprzemiennie. Raz jasniejszy, raz ciemniejszy, az polaczymy kolo. Potem trzeba doszyc male dresden plates w srodku. Ja przyszywalam je recznie i nie zszywalam wszystkich razem w srodku, tylko obcielam konce, a na zakonczenie naszylam na srodek kolko. Czesci dookola dalii najpierw zszylam razem, a potem wszylam kolo (linki do tutkow jak wszyc kolka sa w TYM poscie).

LinkWithin

Related Posts Plugin for WordPress, Blogger...